6.11.2015

en donde estas

Mädi México


When we meet people through blogs and social media, we create bonds based on interests and what we like.

They become part of our lives so we follow them, their projects, achievements and new roads.

Meet our new proyect Mädi México and follow us in  Instagram and Facebook. I'll let you know when we open our store.

See you there!


                                                              ~


Cuando conocemos a personas a través blogs y redes sociales, creamos vínculos basados en intereses y gustos.

Seguimos sus pasos y proyectos, sus logros y nuevos caminos, porque se convierten en parte de nuestra vida.

Te invito a que conozcas nuestro nuevo proyecto Mädi México y a que nos sigas en Instagram y Facebook. Ya te avisaré cuando nuestra tienda esté abierta.

Nos vemos alla!
 post signature

1.05.2014

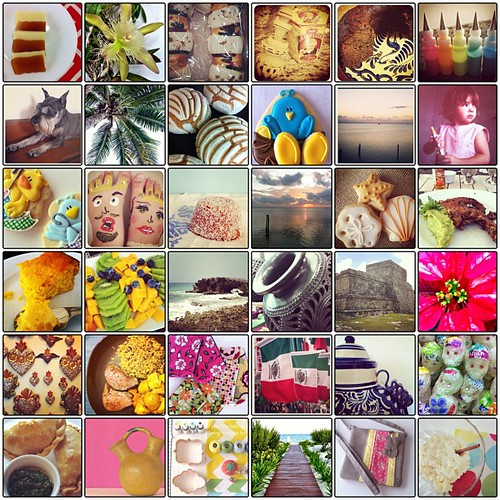
find me on instagram...

@cancuncookies


Hi there!

I hope you enjoyed the holidays and wish you the best for 2014!

Are you on Instagram? I am, too!!! You can follow me on Instagram @beagarciaw


~


Hola!

Espero que hayas disfrutado las fiestas y te deseo lo mejor para 2014!

Estás en Instagram? Yo tambien!!! Puedes seguirme en Instagram @beagarciaw

post signature

1.16.2013

w.i.p. wednesday: take note...

Hola!!


Bunting idea

This week I've been busy working in some Zakka Memo Book Covers for a couple of orders... actually I have to finish 60 tonight!

Zakka Memo Book Covers
Funny how this is somewhat like decorating COOKIES. I cut all the pieces first, and then added details. Today I will sew them together so that will be like baking after decorating, haha!


Other WIP:

I haven't touched my Woodland Sampler since Saturday, boooo! Almost done with the frames, and have 15 days to finish January...

As I didn't finish my Kawaii Winter Wonderland Countdown, I decided I will work on it every month and hopefully it will be done for December...

I joined Rachel's Curves Class and will work on the Pillow as soon as the Zakka Memo Book Covers are done!

I am learning a lot with LiEr's Make a Bag tutorials, and working on the assignments has been a lot of fun!

No progress on my Lucky Stars BOM, mainly because I need to order some solid fabric to go with the Simply Color fabrics I plan to use...


So that's it! Lots of work and lots of fun!!!
Have fun!


Linking up to W.I.P. Wednesday

 post signature

1.08.2013

zakka memo book cover tutorial

Zakka Memo Book Cover Tutorial by CancunCOOKIES

Hello friends! Today I am going to share a Zakka Memo Book Cover Tutorial I've been working on. Hope you all enjoy!

Supplies
Linen:
1 rectangle 11 1/2" x 3 3/4", for the cover 
2 rectangles 4 1/2" x 3 3/4", for pockets

Print Fabric:
1 rectangle 11 1/2" x 3 3/4", for lining
2 rectangles 3 3/4" x 1", for pocket binding
2 squares 2" x 2", for pen holder

Lightweight fusible interfacing:
1 rectangle 11 1/2" x 3 3/4


1 3" x 5" pocket memo book
1 pen, marker or pencil (I used a mini gel pen)

Instructions:
Consider 1/4" seam allowances, unless otherwise specified
For design and embelishment purposes, the right side of the project will be the back

  •  Fuse fusible interfacing onto the wrong side of the lining fabric


  • Fold the pen holder squares in half, wrong sides together, press. Bring both edges to the center, fold and press. Topstitch 1/8" from edge. Set aside

  • Fold the pocket binding in half, wrong sides together, press. Align to the back of the pocket, pin and sew using a 1/8¨seam allowance . 

  • Bring to the front, press and hand stitch or topstitch to the back. See the little linen border on top of the binding? Love it!

  • Lay pockets onto either side of the lining, right sides up. Pin

  • Using a chalk marker or fabric pen, make two marks, left to right, at 2 3/4" and 7 3/4". Fold the pen holders in half and pin position to the right of the marks.

  • Machine baste 1/8" from the edge

  • Lay cover on top, right sides together. Remember that the back of the project to the right, pin. Using a chalk marker or fabric pen, mark a 2 or 2 1/2" space on the right side (back of the cover). This will be the gap for turning the cover

  • Machine stitch all layers together, starting at one of the marks and ending on the other

  • Clip corners and turn right side out. Gently poke corners. Finger press the opening and edge stitch to close

  • Embelish the cover (optional). You can also embelish prior to sewing it all together.
  • Press

  • Insert memo book and pen... ta da!


I made a few more just for fun!


Zakka Memo Book Cover Tutorial by CancunCOOKIES

I'd love to see your creations at the Show me your COOKIE! Flickr group...


Zakka Memo Book Cover Tutorial by CancunCOOKIES

This tuto is for personal use only. If you'd like to sell items made from it, please contact me. Have fun!

Zakka Memo Book Cover Tutorial by CancunCOOKIES


post signature
Related Posts Plugin for WordPress, Blogger...